Humeral Fracture Brace – A Guide for Patients
WHAT IS A HUMERAL FRACTURE ORTHOSIS |
||
| A humeral fracture orthosis is designed to immobilise a fractured humerus (upper arm bone) to assist with healing. A humeral fracture orthosis will be fitted by a professional orthotist upon request from a doctor and is usually worn 24 hours a day for up to 6 weeks or longer. | 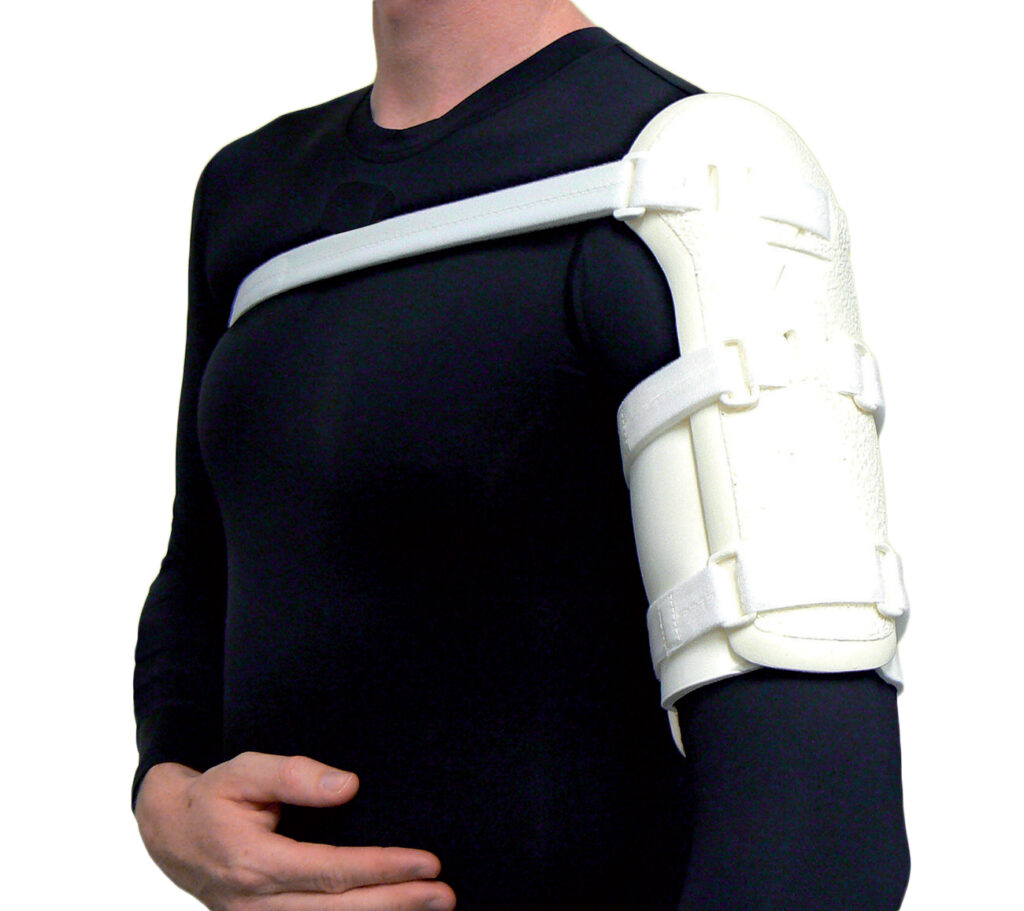 |
|
FOLLOW UP/CARING FOR YOUR ORTHOSIS
oapl will organise a review appointment every 2-3 weeks which will involve removal of the brace to wash the arm, change the sock underneath the brace and check for any issues. If you are unable to get to one of OAPL’s clinics for a review, we can organise a home visit or educate a family member/nurse on how to perform these sock changes.
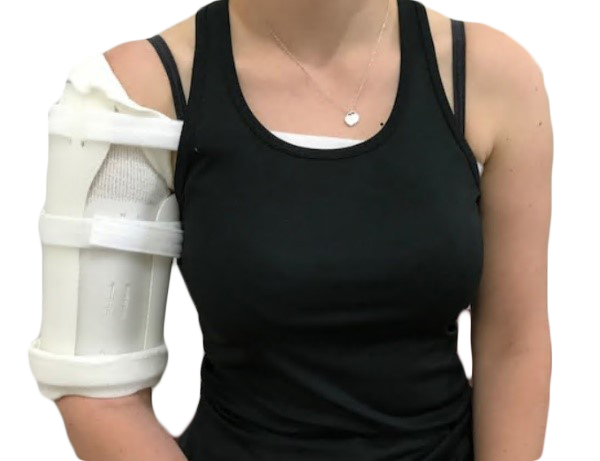
HOW SHOULD THE BRACE FIT?
The brace works by applying circumferential pressure around the broken bone to prevent it from moving so the brace should be firm at all times. Often in the first few days after your injury, your arm swelling will sub-side a lot. If the Humeral Fracture Orthosis is loose, please have a health professional, friend, or family member tighten it firmly by grasping the orthosis with one hand and pulling the Velcro straps (one at a time) carefully with the other hand. The sock underneath the brace will protect your skin from the plastic so ensure that this is pulled up over the edges of the brace at all times.
Usually your Doctor will ask for the Humeral Fracture Orthosis to be worn with a ‘collar & cuff’ sling, so wear this as directed. You can still move your wrist and hand but keep elbow movements to a minimum.
WASHING AND HYGIENE
Your brace will need to remain dry at all times so unless you are able to organise a fail-safe way of keeping your arm/shoulder dry during bathing you will need to sponge bathe to avoid it getting wet. A family member or friend may be required to assist you with this depending on your mobility.
PRECAUTIONSIf you suspect you have: |
|||
| • skin problems • an area of rubbing that doesn’t go away • pain • numbness |
• tingling • loss of feeling • or a lot of arm swelling |
||
Please contact your Orthotist, Doctor or local emergency department ASAP. |
|||
INSTRUCTIONS FOR REMOVAL/RE-APPLICATION AT HOME
If you are not being reviewed by oapl every 2 weeks, these instructions should assist a family member/nursing staff to remove the brace, wash the arm then re-apply the brace at home.
REMOVING THE ORTHOSIS
 |
 |
 |
 |
|||
| Fig 1 | Fig 2 | Fig 3 | Fig 4 | |||
|
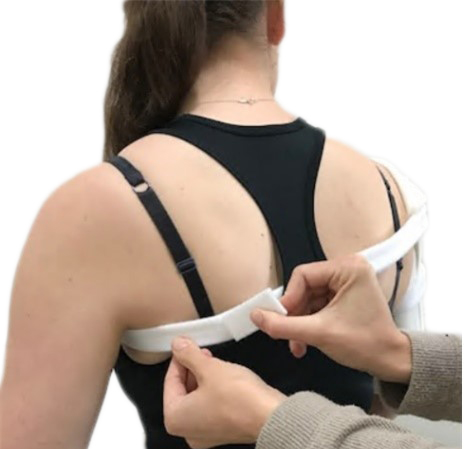
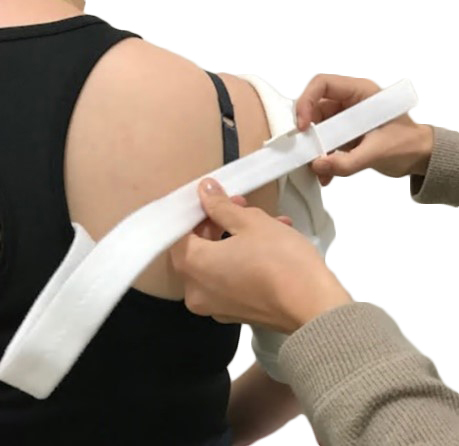
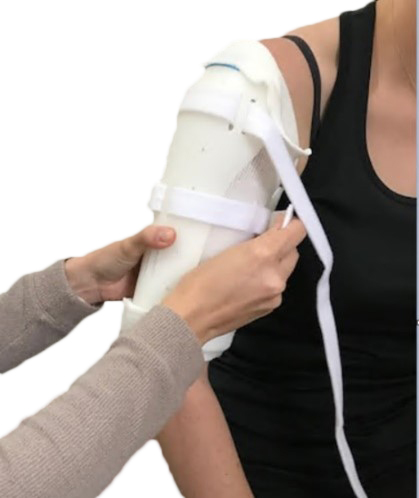
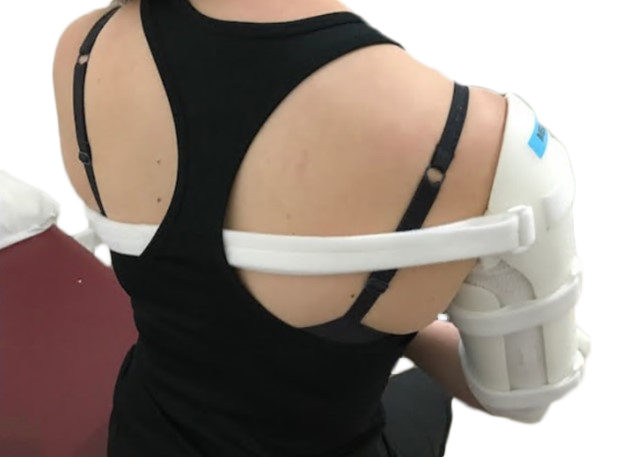
Begin by undoing the chest strap from the back (Fig 1) and unthreading the strap from the brace completely (Fig 2). Tuck the strap under the un-injured arm and clothing so that it is free. |
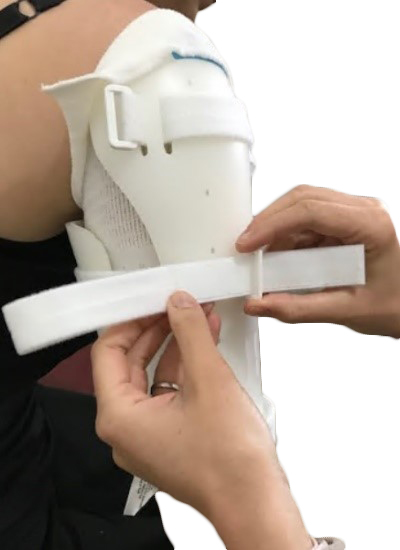
Next, undo both top (Fig 3) and bottom strap on humeral section of the brace and unthread completely (Fig 4) |
|||||
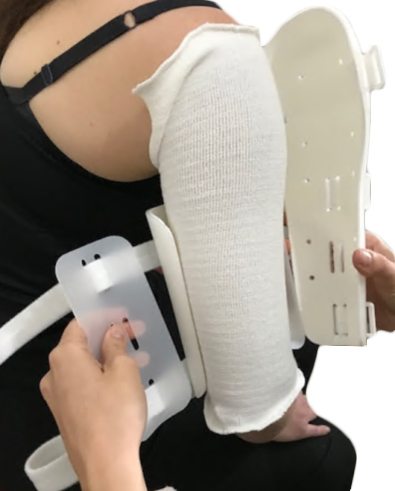 |
Fig 5 Once both straps are undone, you should be able to open the brace up and gently remove from the arm (Fig 5). Once brace has been removed, lay down flat to avoid straps from becoming tangled and gently remove the sock from the arm. While brace is off, ensure patient supports their un-injured arm by resting their forearm on a bench or supporting it with their other hand. |
|||||
WASHING/HYGIENE
 |
 |
 |
||
| FIG 6 | FIG 7 | FIG 8 | ||
|
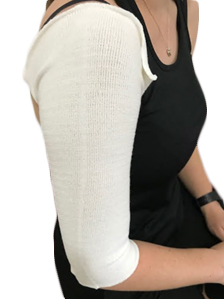
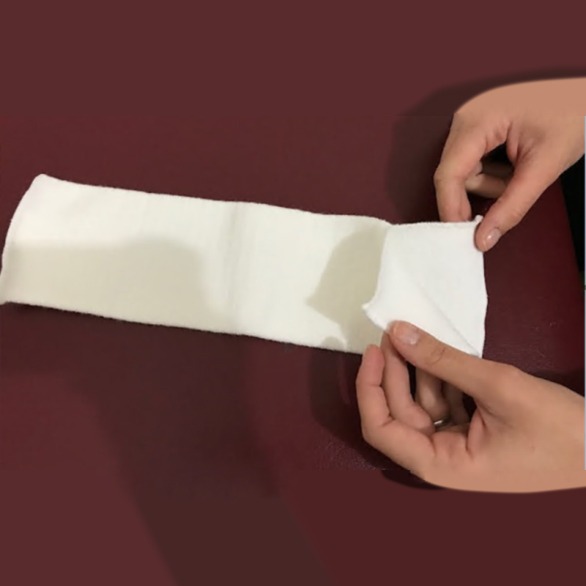
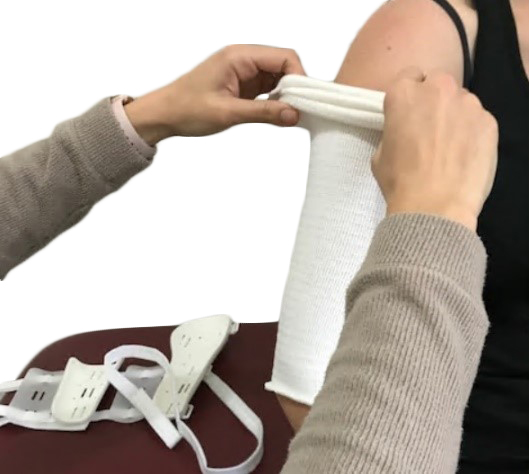
Every patient is supplied with 2 socks; one to wear and one to be cleaned for future use. Your spare sock should have a cut in one end (Fig 6), this should be applied so that the cut section sits under the armpit (Fig 7). |
Once sock has been removed, clean the skin using a damp cloth and gentle soap ensuring that the underarm area and elbow crease are washed well. During this time, check the skin for any pressure areas. Once clean, ensure that arm is completely dried before re-applying a clean sock. We recommend not using any lotions on the skin unless absolutely requied as this may cause irritation once the brace has been re-applied. |
|||
RE-APPLYING THE ORTHOSES
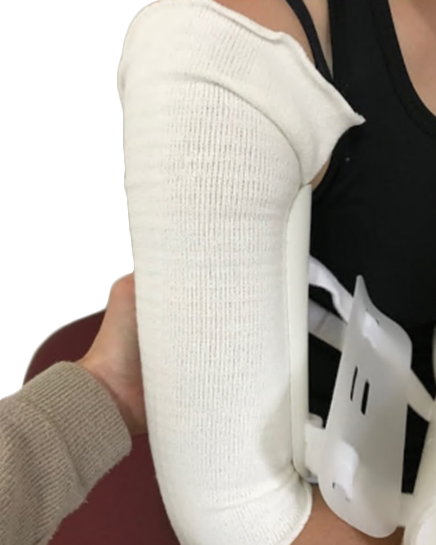
Ensure that sock is pulled all the way over the shoulder and that there is coverage over whole arm up to underarm.
 |
 |
 |
||
| Fig 8 | Fig 9 | Fig 10 | ||
|
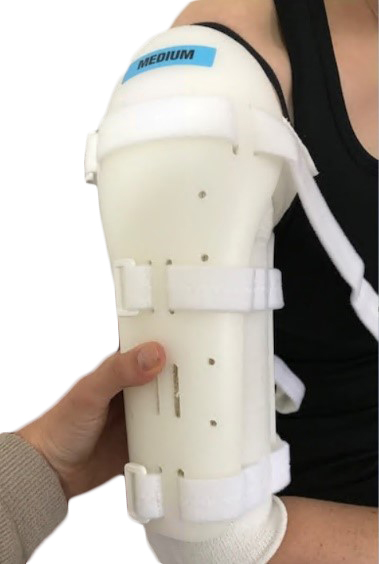
To re-apply, begin by placing the smaller white plastic section on the inside of the upper arm ensuring that the top edge is as close to the armpit as possible without digging in (Fig 8). Then place the larger plastic section over the shoulder ensuring that the thin clear piece of plastic overlaps both white sections by sitting UNDER the edge of the white plastic (Fig 9). Ensure that thin plastic at the back of the arm also overlaps both thick white pieces by sitting underneath them (Fig 10). |
||||
 |
 |
 |
||
| Fig 11 | Fig 12 | Fig 13 | ||
|
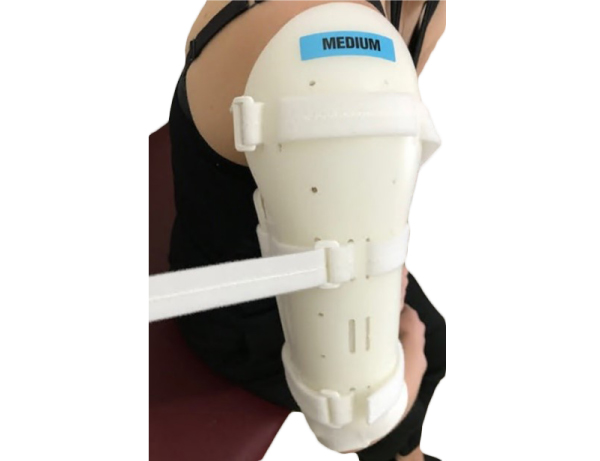
Pull sock out from under shoulder piece and Velcro onto brace above sizing label (Fig 12). Once all 4 plastic sections are overlapped, hold brace in place with one hand and tension both arm straps firmly so that there is no movement possible (but careful not to tension too firmly) (Fig 11). Apply the chest strap directly on the skin (weave under clothing if necessary), pass strap underneath un-injured arm and thread through loop at top/back of brace. This strap should be firm but not too firm that it digs into contralateral underarm. If you suspect that there is a problem with the brace please call OAPL on 1300 866 275 to organise a review. |
||||
| Distributed by OPC Health | 26-32 Clayton Road, Clayton VIC 3168 P: 1300 672 937 E: sales@opchealth.com.au |
||||